
eCommerce Platforms
Getting started with Magento 2
The following document has been developed for Magento 2 eCommerce stores. The guide will cover the installation of the Magento 2 plugin (updated v2.0) as well as an end-to-end testing guide.
Prerequisites
- Magento version 2.2.2 (or greater)
- PHP v7.1 (or greater)
- CURL v7.50 (or greater) - note: this must be the CURL that Magento 2 PHP is using. To find your CURL version follow this guide.
- Firewall (if present) will need to whitelist the bolttech API endpoints:
1. Installing the bolttech Extended Warranty v2 extension
The following details the manual installation of the bolttech Extended Warranty extension. It’s is a guide for instances that has version 1 installed previously. If you do not have version 1 installed on this particular instance of Magento, then you can just follow the general installation guide as provided previously.
Step 1: Install source files of version 2 extension
-
Log into your hosting panel via FTP client or SSH and navigate to your Magento instance
-
Unzip extension package provided bolttech_extended_warranty_v2.0.zip and copy the “Bolttech” directory
-
Copy the files to {root}/app/code/ directory on your Magento 2 instance.
-
The folder structure for this extension should be: app/code/Bolttech/ExtendedWarranty/…
Step 2: Compile the extension
This process is same as installing version 1.
Open up your terminal window, navigate to your Magento 2 root directory and run the following commands:
php bin/magento setup:upgrade
php bin/magento setup:di:compile
php bin/magento setup:static-content:deploy
The extension should now be installed!
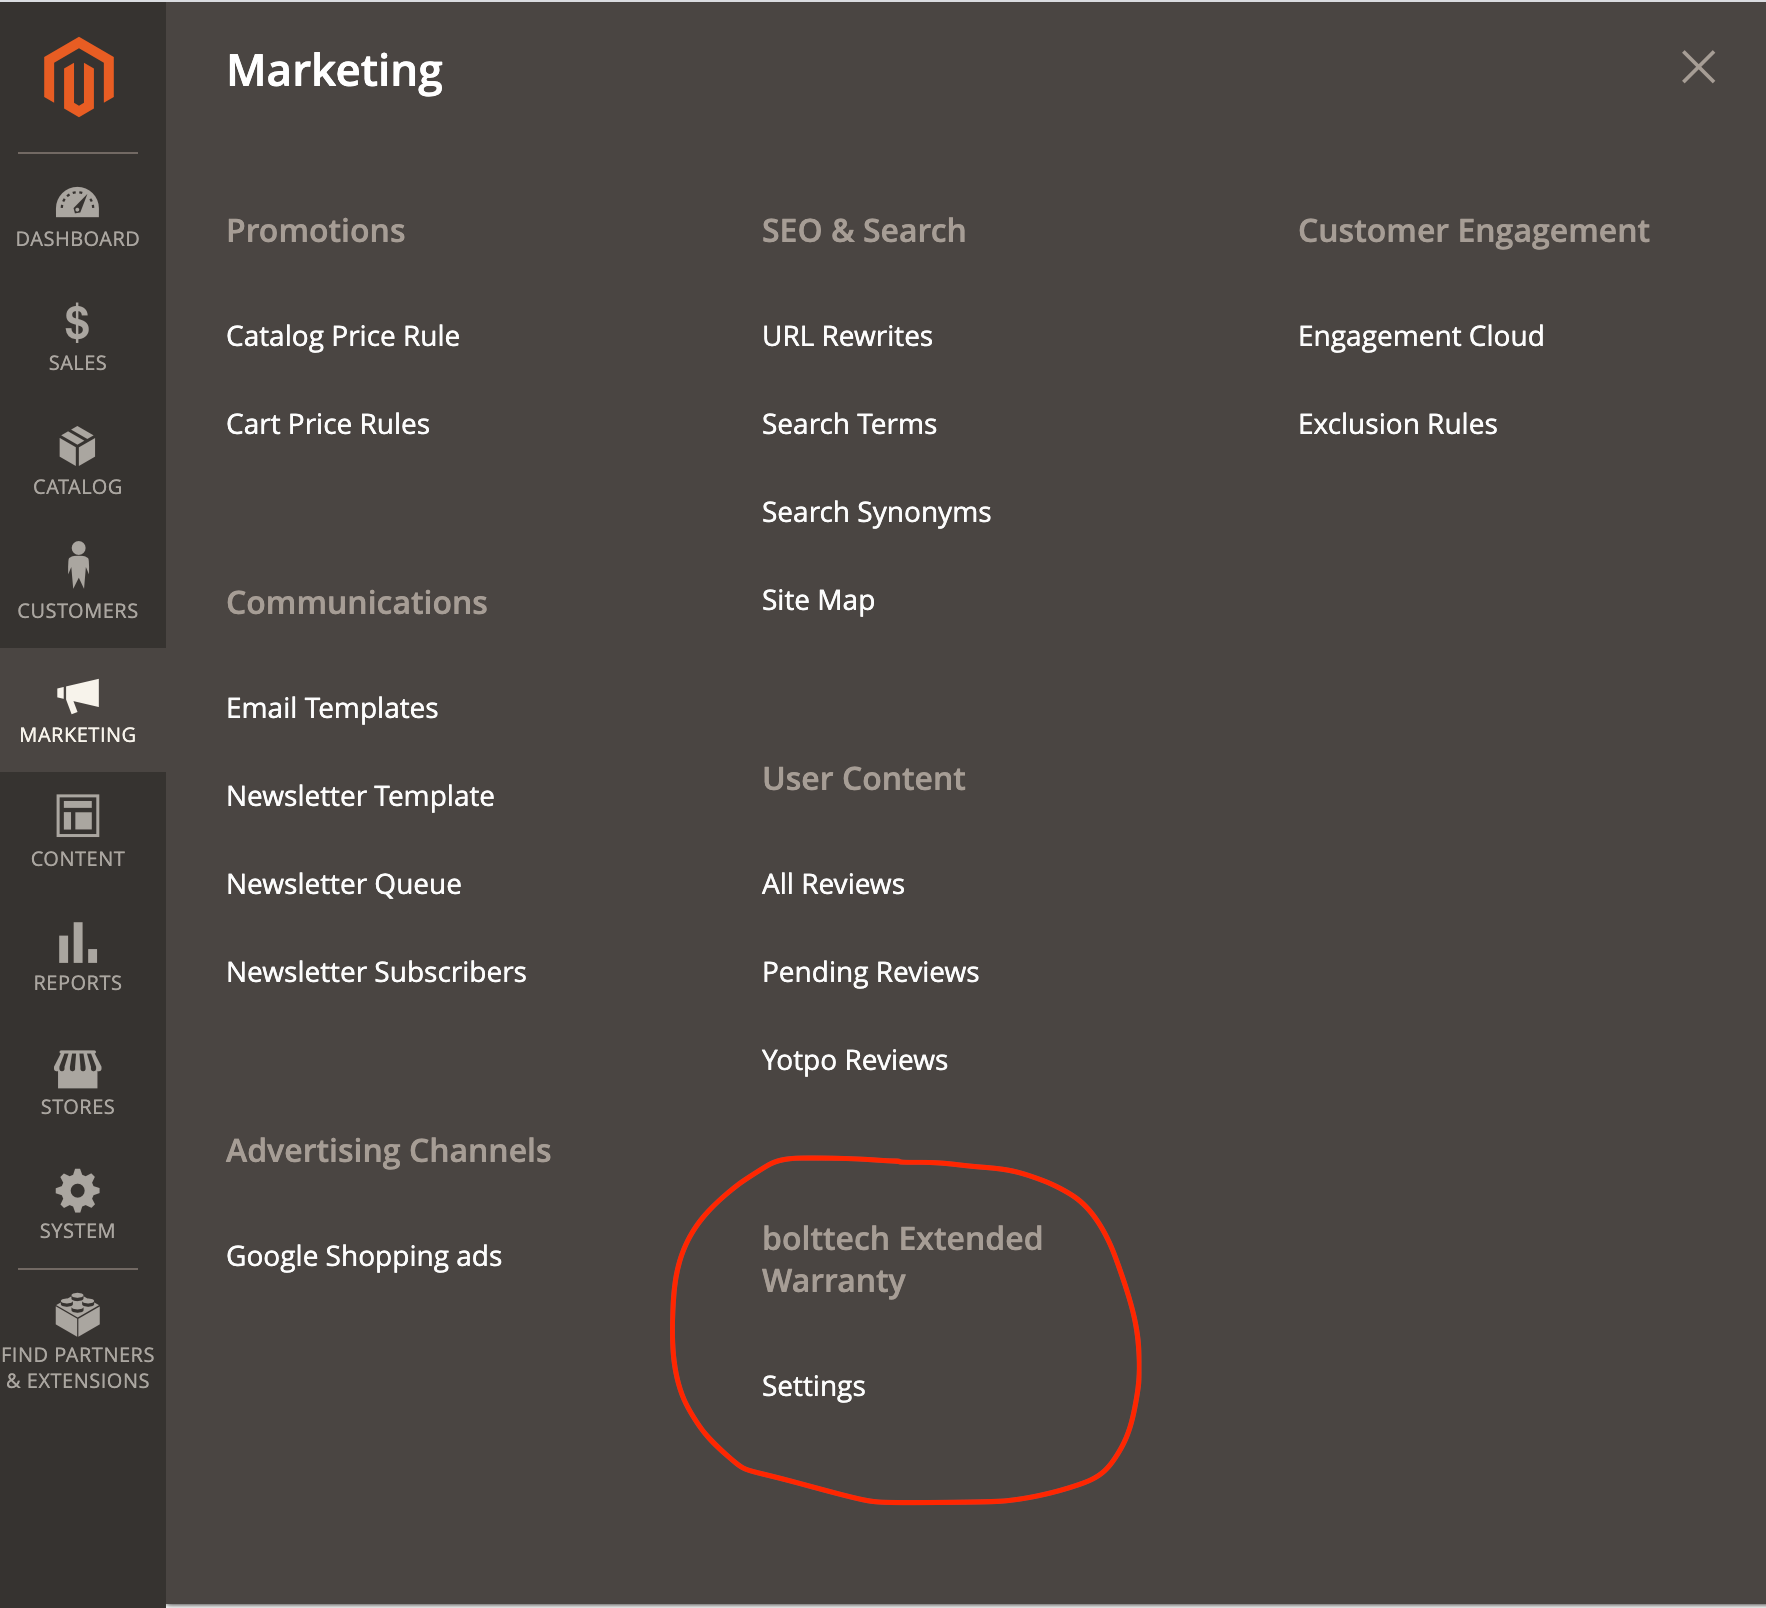
You should now have a new menu option within Magento Admin under: Marketing > bolttech Extended Warranty > Settings
2. Configuring the extension
Once the extension has installed correctly - it is now ready to be configured. You will need the following from the Merchant Portal:
Before you can start this step, you will need the following from the Merchant Portal:
- Merchant ID
- API Keys
If you do not know how to obtain these details, please see our article on How to get Merchant ID and API Keys
-
Go back to Magento Admin
-
Navigate to Marketing > bolttech Extended Warranty > Settings
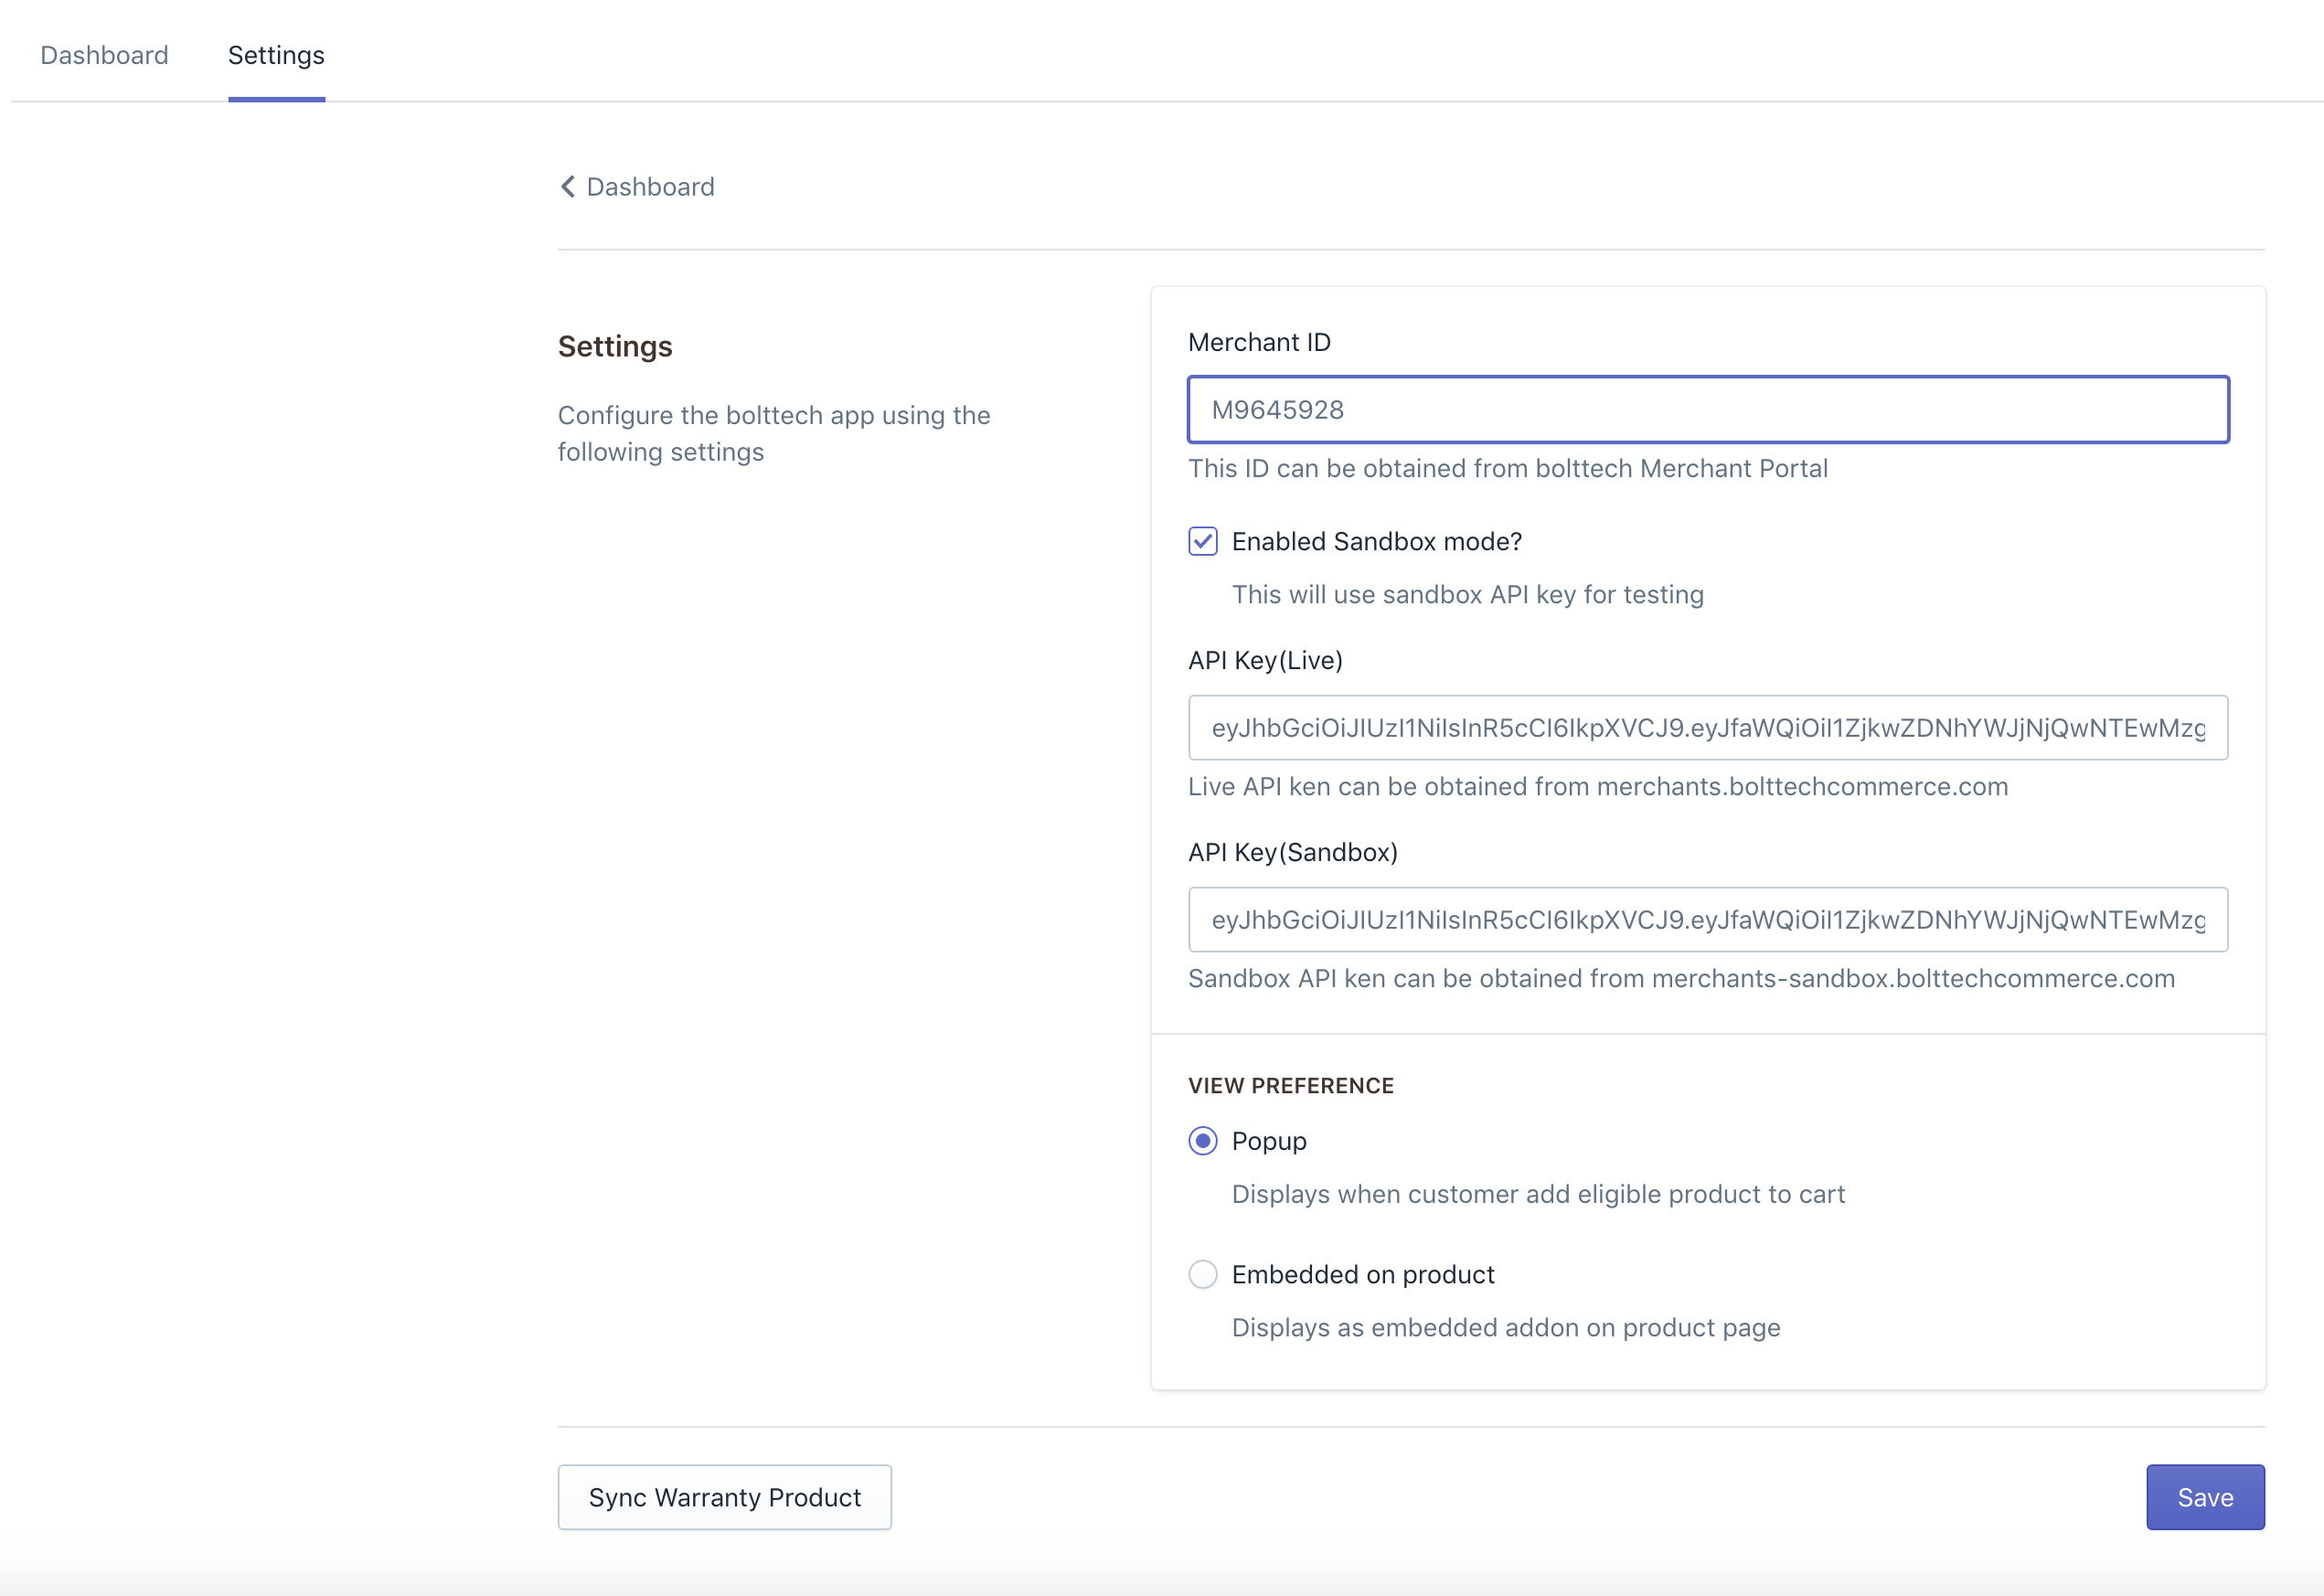
-
Click the Settings tab on the top
-
Enter your Merchant ID
-
Enter the sandbox API Key in both API key fields (NOTE: when going live, you will need the Live API key to be populated from the live merchant portal)
-
Ensure “Enable Sandbox mode?” is checked
-
Click Save
-
You should receive a success message “Your settings successfully updated!”
Sync the available warranties to your catalogue
You now need to ensure your catalogue has the relevant extended warranties offered by bolttech. To do this follow these steps:
-
Within the Settings tab, click “Sync Warranty Products” button.
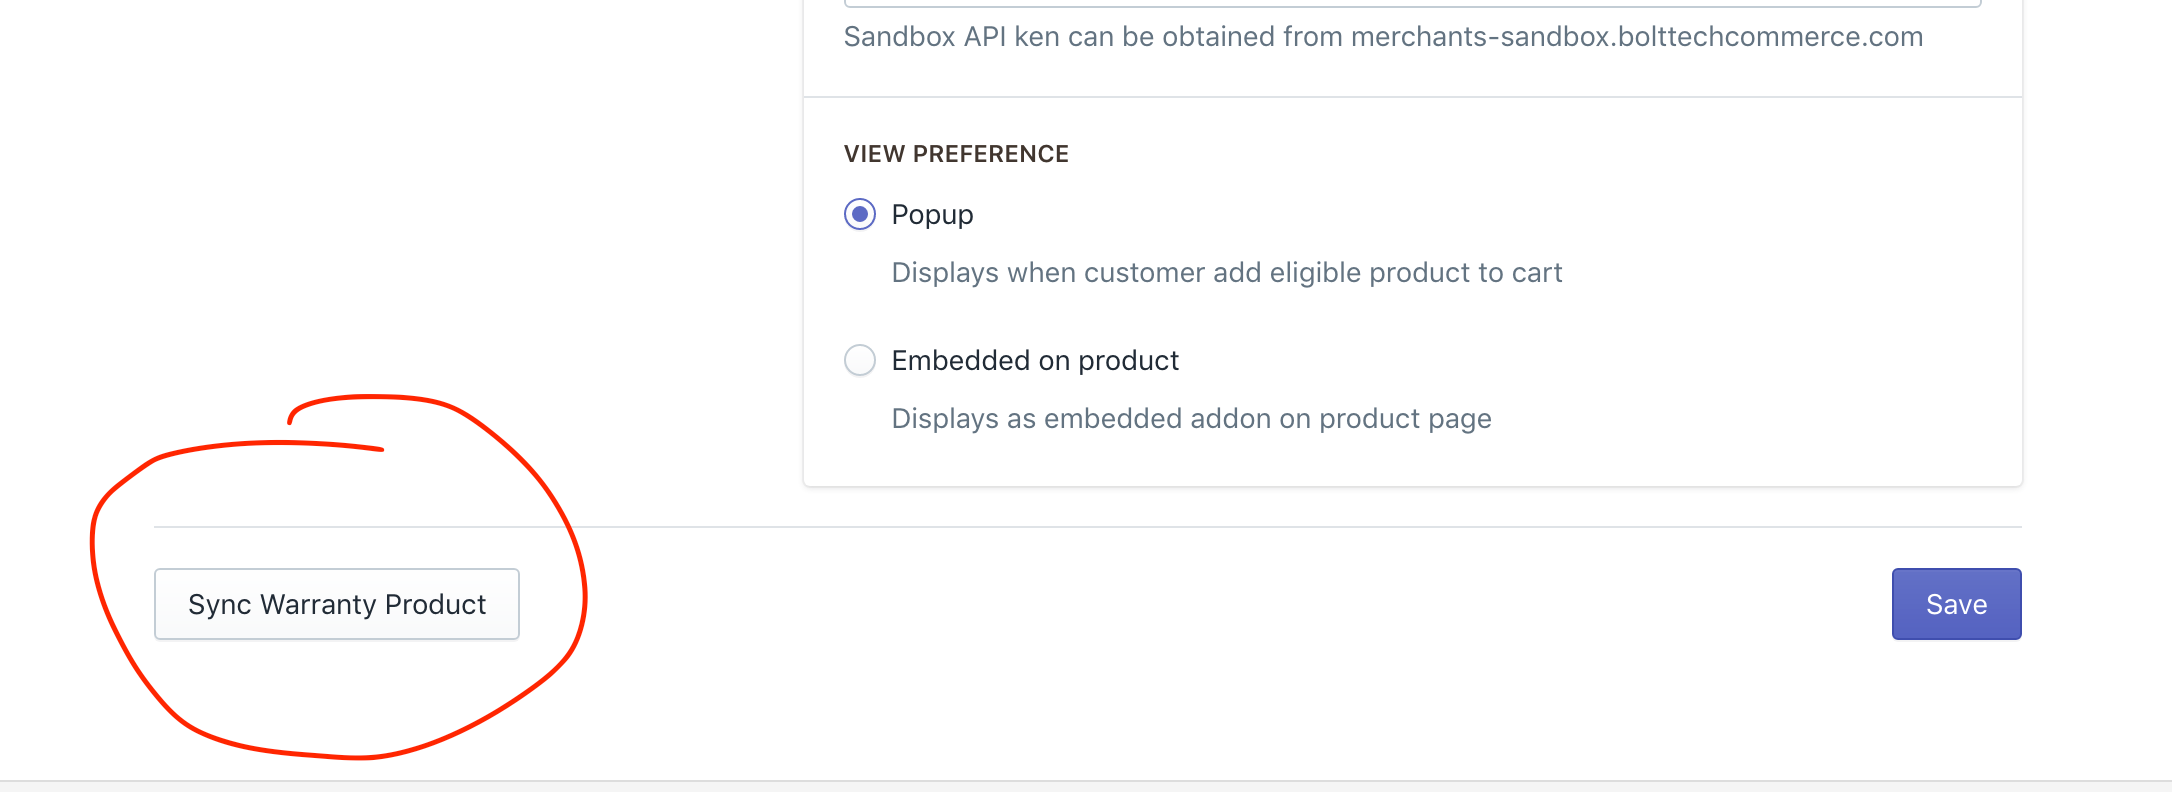
- You should receive the following success message “Warranty products successfully updated!”.
NOTE: if you receive an error message here, then there is an issue with the API configuration in the previous step. Please contact us if this is not the case -
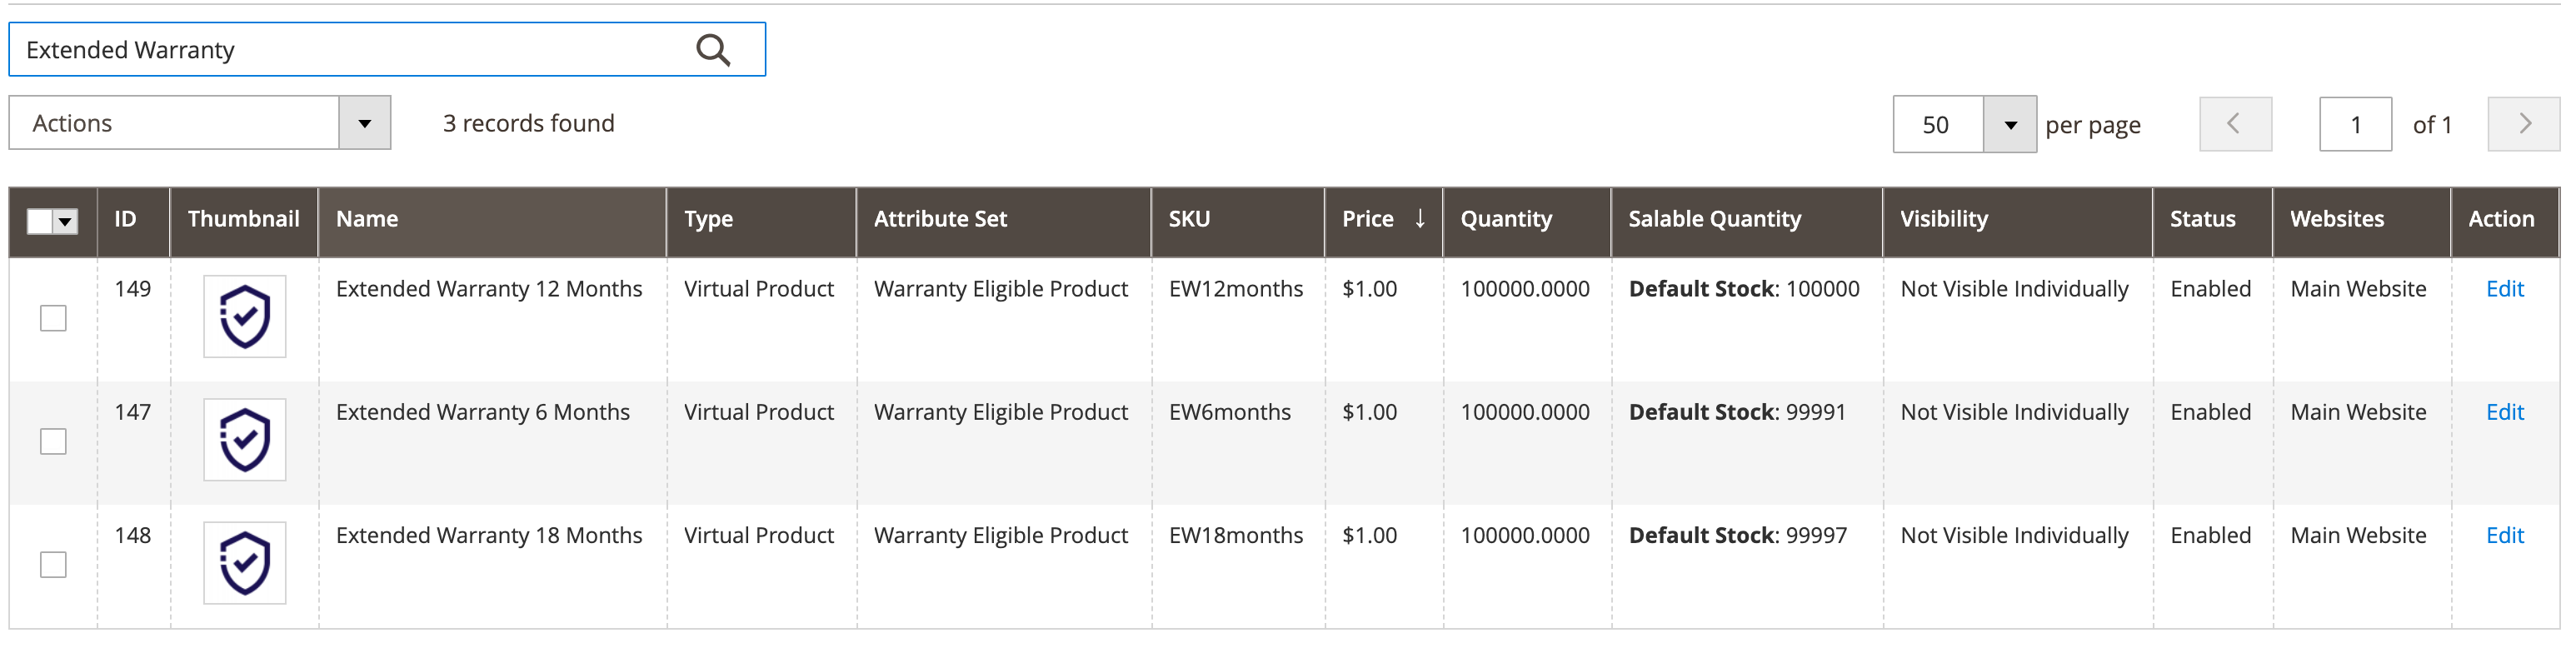
The warranty products should now be in your catalogue. Test this by navigating to Catalog > Products and typing “Extended Warranty” within the search field. You should see the bolttech warranty products here. There is no need to change any information within these products.
Troubleshooting FAQs
The popup or embedded form won’t display, even though I have an eligible product?
If you are experience this, please check the product is available in the Merchant portal. Also check the SKU within your eCommerce store catalogue is unique, and the same as a SKU uploaded to the Merchant portal. Finally, re-check eligibility on the Merchant Portal.
Can I have multiple products with the same catalogue SKU?
No. SKU’s must be unique.
I need to change my catalogue SKU? Will the product still display the extended warranty user interface?
No. However, if you need to update a SKU, simply apply the updates within your eCommerce store and re-upload (with updated SKUs) to the Merchant Portal.
I cannot sync the extended warranty products within the extension settings.
This means that you are not able to hit our API. Please check your version of CURL that is being used by PHP is greater than 7.50 and you have no firewalls blocking https://merchants.bolttechecommerce.com/api or https://merchants-sandbox.bolttechecommerce.com/api
.